GitHub Setup
Github will be the main location of our collaborative work in EDCI338. While Github was created for teams to collaborate on coding projects, it can also be used for many other projects. Some of the language around interacting with Github might be new to you, but that is ok, it will seem foreign at first, but the whole point of you taking this course is to learn new skills, right?! I’m here to help.
The first thing you might notice is that there are some weird punctuation marks in the raw text in Github. That is called Markdown, which is a way to tell web-browsers how to style text. The basics are super easy to learn, and they map pretty well to what you might do in a word processor. For example, in MS Word, if you want to indicate a heading, you put your cursor in the text, and choose the Heading 2 style. You can do the same thing in Markdown by simply adding two hashtags and a space before the text, like this…
## Markdown
Which shows up on the page like this…
Markdown
Each heading level uses the corresponding number of hashtags.
Heading levels
# Heading 1
## Heading 2
### Heading 3
#### Heading 4
##### Heading 5
###### Heading 6
Styling text
You can also style text as italics *italics*, or bold **bold**, and you can also stack codes so bold italics ***bold italics***.
Lists
You can quickly and easily create an unordered list (bullets) with either a *, or a - followed by a space…
- berries
- fruit
- vegetables- berries
- fruit
- vegetables
You can create an ordered list by doing the same with a number and a .…
1. Cycling
2. Running
3. Rowing- Cycling
- Running
- Rowing
Hyperlinks
Put the text you want to display between square brackets, followed by the URL in parentheses
[Put the text you want to display between square brackets, followed by the URL in parentheses](https://edtechuvic.ca/edci338)
Images
Images use the same syntax as hyperlinks, except they use an ! at the beginning, so…
 renders to

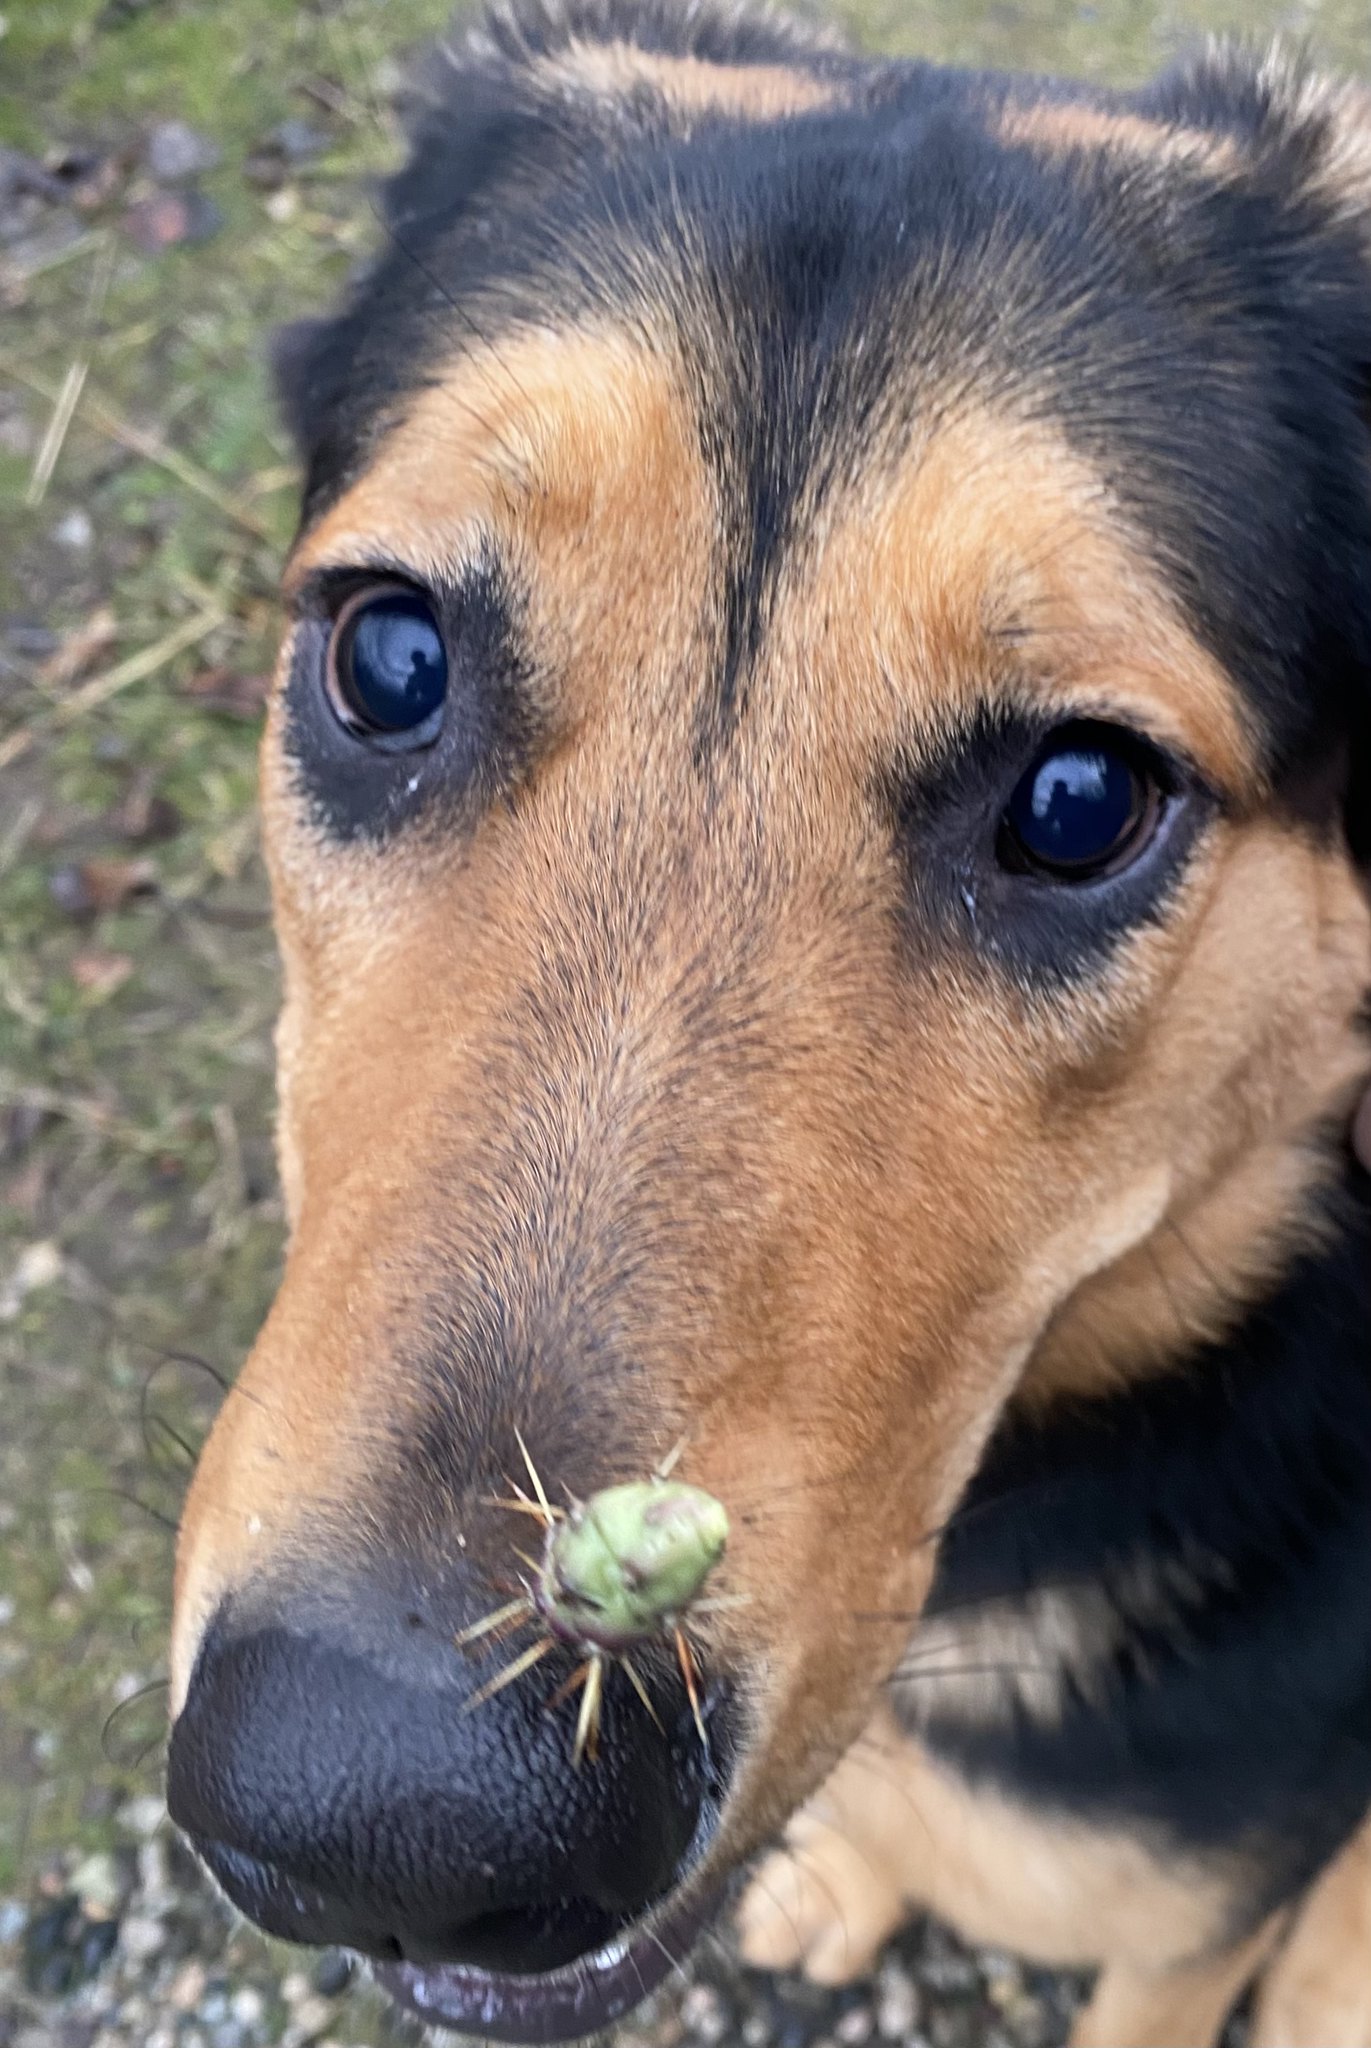
Ellie with a cactus in her nose
The difference with images is that you need to make sure the image is physically in the same repository that you are working in. In this case, the image is in the assets/w1/ folder.
Things To Do in GitHub
✔️ Register for an account.
✔️ Create a new repository called EDCI338
✔️ choose ‘Private’ in the visibility settings (step 4, above)
✔️ Go to the course repository
✔️ Click Issues, then New Issue, then Get Started to create a Learner Profile for yourself.
✔️ If you know who will be in your learning pod, please add the Label to your issue that corresponds with your Learning Pod, otherwise, you can just add a label that has fewer than 4 members already.
Fork, Pull, Fetch
Sometimes the lingo of Git and GitHub can be a bit confusing, and perhaps like there are too many steps to just save some work. Admittedly, the language does take some time to learn, but it is rather intuitive once it is explained.
The way that we are using GitHub (editing content directly within the web interface) isn’t the typical workflow, but that is ok.
You should think of the course repository, which I own, as the remote, meaning that it is the content stored on the web, not on your computer (which would be local). When you edit on GitHub, you have limited permission to make changes in that you can’t make changes directly to my repository, but rather, you need to propose changes, and ask me for permission to change the repository. You do this by creating a pull request, which is just you telling me that you have some proposed changes and asking me to pull them from your proposal into the repository.
Creating a pull request like this is what allows us to collaborate on the repository without your changes overwriting the course materials.
This creates a fair amount of friction in that you need to wait for me to approve your changes before you can proceed.
There is a way around this though, and that is by creating a fork of the repository (several of you did this at the beginning of the course already). A fork is an exact copy of a repository at a particular point in time. So if you forked the course repo on January 14, you would have a copy of the course materials as they were on Jan 14, but there would be a notification that your copy is x number of commits behind the remote repo. If that is the case, you can catch up to the remote by clicking fetch upstream, then fetch and merge.
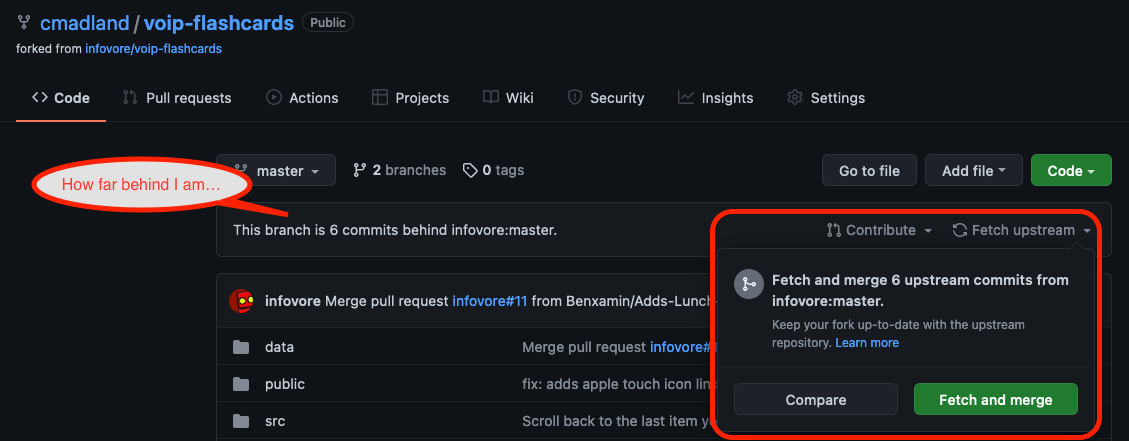
Fetch and Merge in Github
Once you have a fork of the repository, you can make all the changes you want to your copy of the repository, then, when you are ready, you can open a pull request to have your changes merged into the main repo.
✨ ProTip
For EDCI338, you need to have ONE person from your learning pod with an up-to-date fork of the course repository, then the other people in the learning pod should fork that repository. for example, the main repo is at cmadland/edci-202201, and Chloe has a fork at chloelyh/edci338-202201, so each of Chloe’s learning pod members should fork chloelyh/edci338-202201.
With this setup, each learning pod can be working on their own repo without any need for me to approve changes before they continue. then, when they are ready, each learning pod member opens a pull request with Chloe, who merges all the changes into her repo, then opens a pull request with my repo to merge all of those changes to the main. This way, each individual learning pod members’ contributions are recorded along with the learning pod as a whole.
Adding an Image
Adding images requires a little bit of work, as it isn’t drag and drop like you might be used to in your word processor. That said, it’s relatively straightforward.
Add a folder
In your repository, click the assets folder, then click Add file, then Create new file.
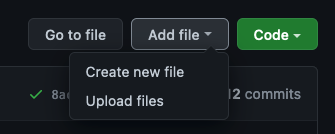
Add a new file in GitHub
This step will only create a new folder for you; you won’t add the image yet.
Enter the name of your social media platform and then type a / (this step is important!!) and then type a random word like sample or placeholder.

Give the folder a title

Give the file a name.
Commit and push your changes.
Since this is your own repo, you will be able to commit directly to the main branch of your repository.
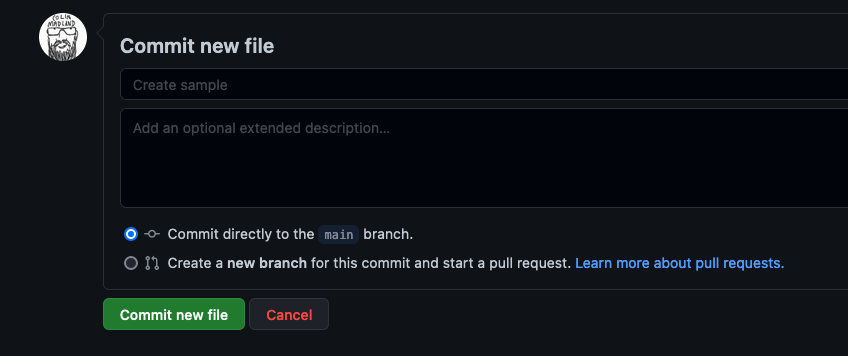
Commit your changes
You will then have a folder with the title of your social media platform inside the assets folder. There will be one file inside your platform folder, but you can ignore or delete it.
Prepare your image file.
Your image should be relatively small (under 1MB), so if it is too large, you can compress it with tinypng.com. The filename should be as simple as possible; one word is ideal. Don’t use any capital letters, punctuation, spaces, or symbols other than - or _.
Upload your image.
Click into your new folder, and click Add file, then Upload files. You can either drag and drop your image, or navigate to the file on your computer.